If your PC meets the minimum requirements to run Windows 11, you can get the first preview build of Windows 11. The first preview build of Windows 11 is free to download, but you need to join the Windows Insider program to receive the upgrade. If we talk about customization, users can also enable Dark mode on the new operating system. However, since Windows 11 has a new Settings page, many users are finding it hard to access the Dark Mode option.
Steps to Enable Dark Mode in Windows 11
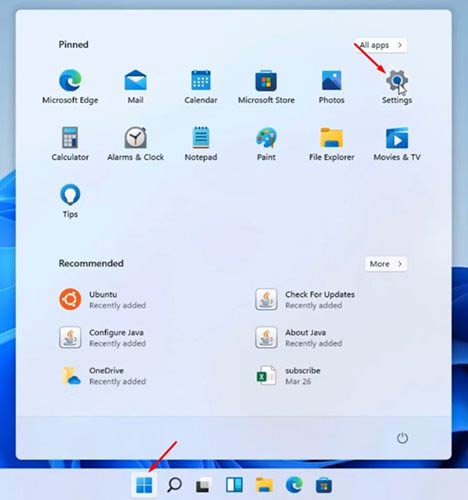
So, if you are also unable to find the Dark Mode option in Windows 11, this post might help. In this article, we will share a step-by-step guide on how to enable dark mode in the new Windows 11 operating system. Step 1. First of all, click on the Start button and then select the ‘Settings’ option.
Step 2. On the Settings page, click on the Personalization option on the left pane.
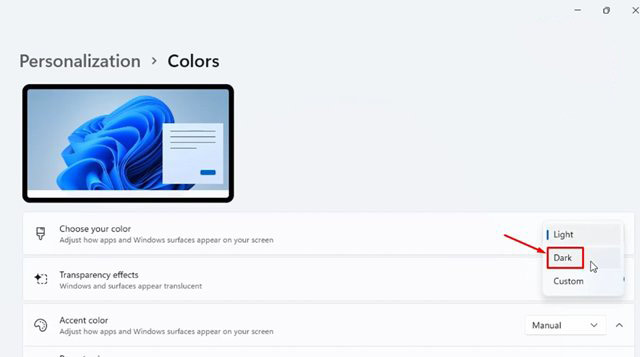
Step 3. On the right pane, click on the ‘Colors‘ option. Step 4. Next, click on the dropdown menu next to the ‘Choose your color’ box. Select the color mode to ‘Dark‘
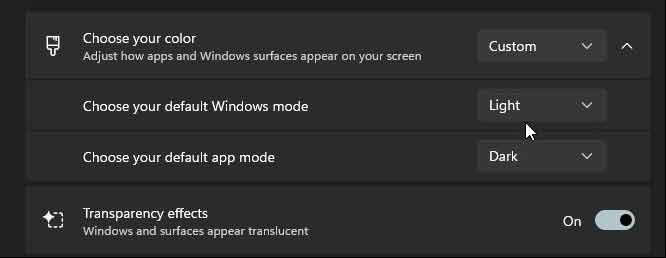
Step 5. Within a few seconds, Windows 11 will switch to dark mode. Step 6. Just like Windows 10, Windows 11 also allows you to combine light and dark or use the custom mode. For that, you need to modify the ‘Choose your default Windows mode’ and ‘Choose your default app mode’ options.
That’s it! You are done. This is how you can enable dark mode on Windows 11 operating system. The benefit of enabling Dark Mode is that it greatly reduces eye strain. Also, if you are using a laptop, turning on the dark mode can result in better battery life. Apart from that, it also improves content visibility, especially at night. So, this guide is all about how to enable dark mode on Windows 10 computers. I hope this article helped you! Please share it with your friends also. If you have any doubts related to this, let us know in the comment box below.
Δ


